Invoices in NoteItAll are tracked internally — you create them, record payments as they arrive, and export PDFs to send from your own email client. This guide walks through setting up your invoice preferences, creating invoices manually and from appointments, recording payments, and voiding or deleting invoices you no longer need.
- 1
Set up your invoice settings
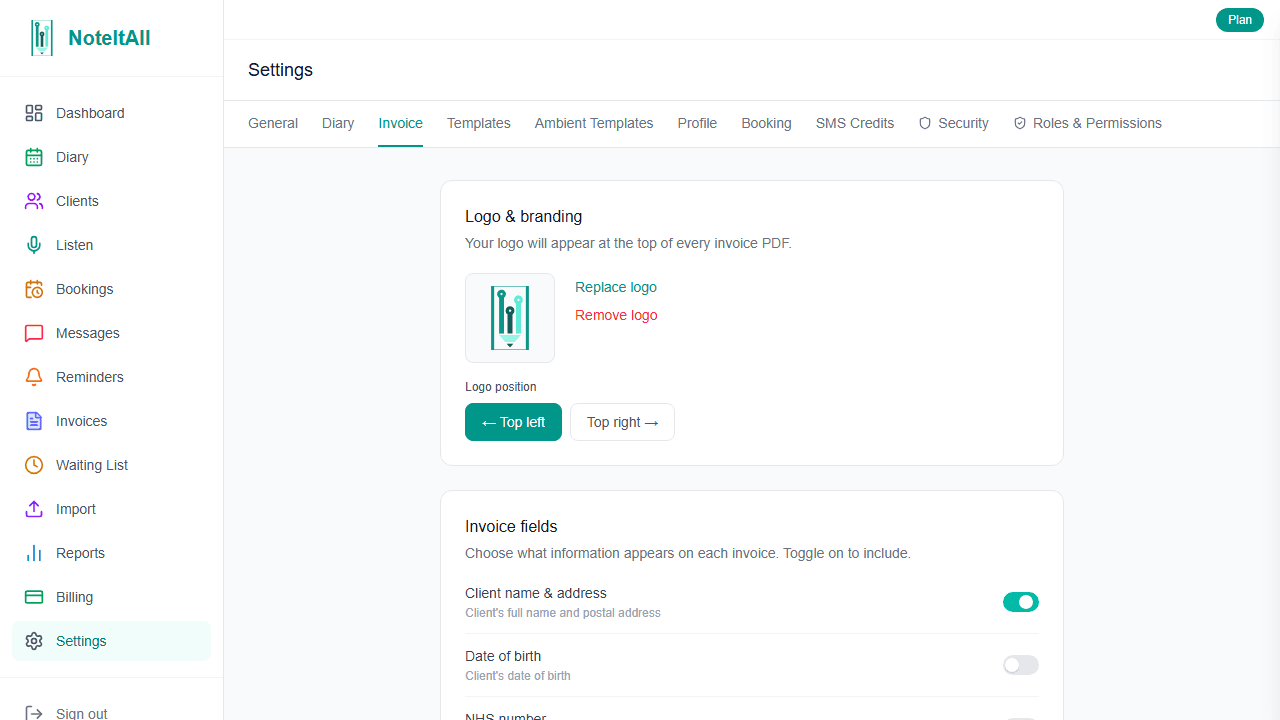
Go to Settings → Invoices. This is where you configure everything that appears on your invoices before you create the first one.
- Logo — upload a clinic logo (JPG or PNG, up to 1 MB) and choose whether it sits on the left or right of the invoice header.
- Invoice prefix and number — the prefix (e.g.
INV) combined with the next invoice number forms your invoice number sequence (e.g.INV-0042). You can change both at any time; the number increments automatically after each invoice is saved. - Currency — choose GBP, EUR, or USD. This applies to all invoices.
- Default payment terms — same day, 7, 14, or 28 days. The due date on new invoices is calculated from this setting.
- Default tax rate — set a percentage (0–20%) that pre-fills the tax field on new line items.
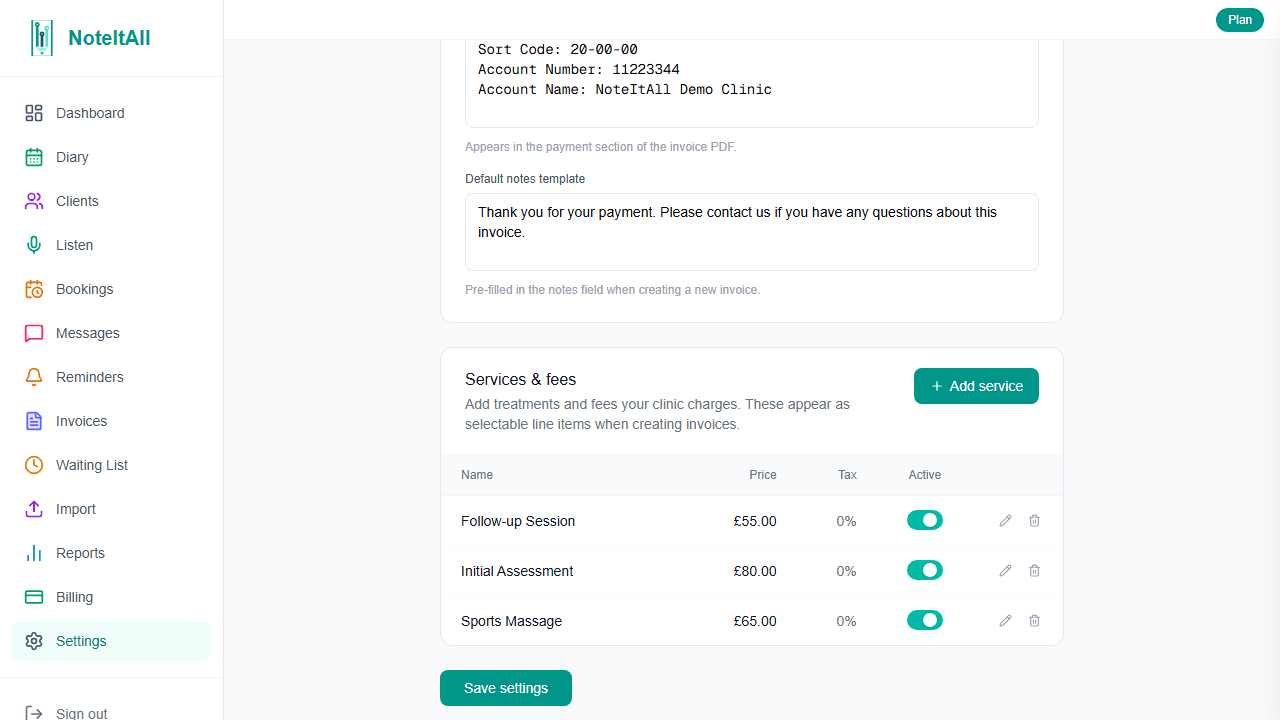
- Bank details — free text shown at the bottom of every PDF. Include your account name, sort code, and account number here.
- Notes template — pre-fills the notes field on every new invoice. Useful for a standard payment message or late-payment clause.
- 2
Add your service items
Still on Settings → Invoices, scroll down to the Services & fees section. Service items are the treatments or services you bill for — once added, they appear in a dropdown on every invoice line item and auto-fill the description, unit price, and tax rate.
Click Add service item, enter a name, an optional description, the unit price, and a tax rate, then save. Toggle items inactive rather than deleting them if you want to stop them appearing on new invoices without losing them from historical ones.
When an invoice is created directly from an appointment in the diary, the service item whose name matches the appointment type is selected automatically.
- 3
Create your first invoice
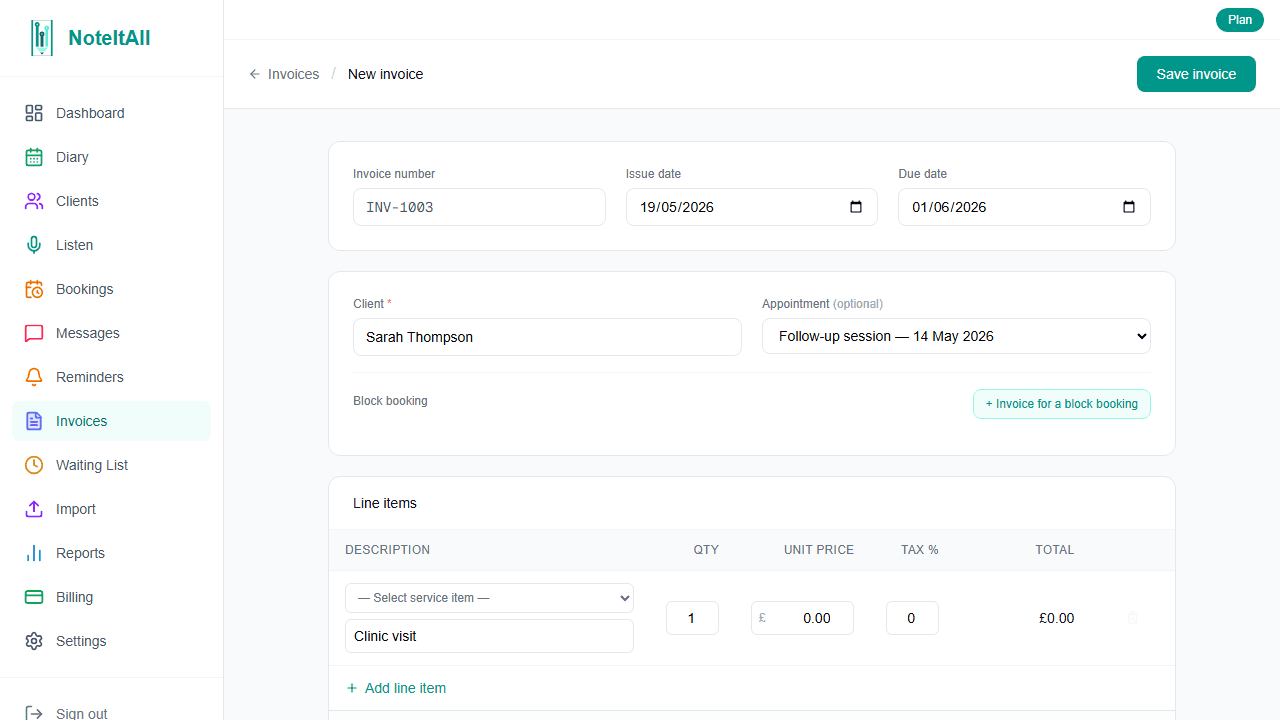
Click Invoices in the sidebar, then New invoice.
- Patient — start typing to search; select the patient you're billing.
- Appointment or block booking — optionally link the invoice to a specific appointment or block booking for your records. This is not required.
- Issue date and due date — issue date defaults to today; due date is calculated from your default payment terms. Both are editable.
- Line items — add one or more rows. For each row, pick a service item from the dropdown (which auto-fills description, price, and tax) or type manually. Adjust quantity and unit price as needed.
- Notes — pre-filled from your notes template; edit freely.
- Create as paid — if the patient paid at the time of the appointment, toggle this on and select a payment method and date. The invoice will be saved as paid immediately.
Click Save invoice. The invoice is created in draft status and assigned the next invoice number.
- 4
Create an invoice from an appointment
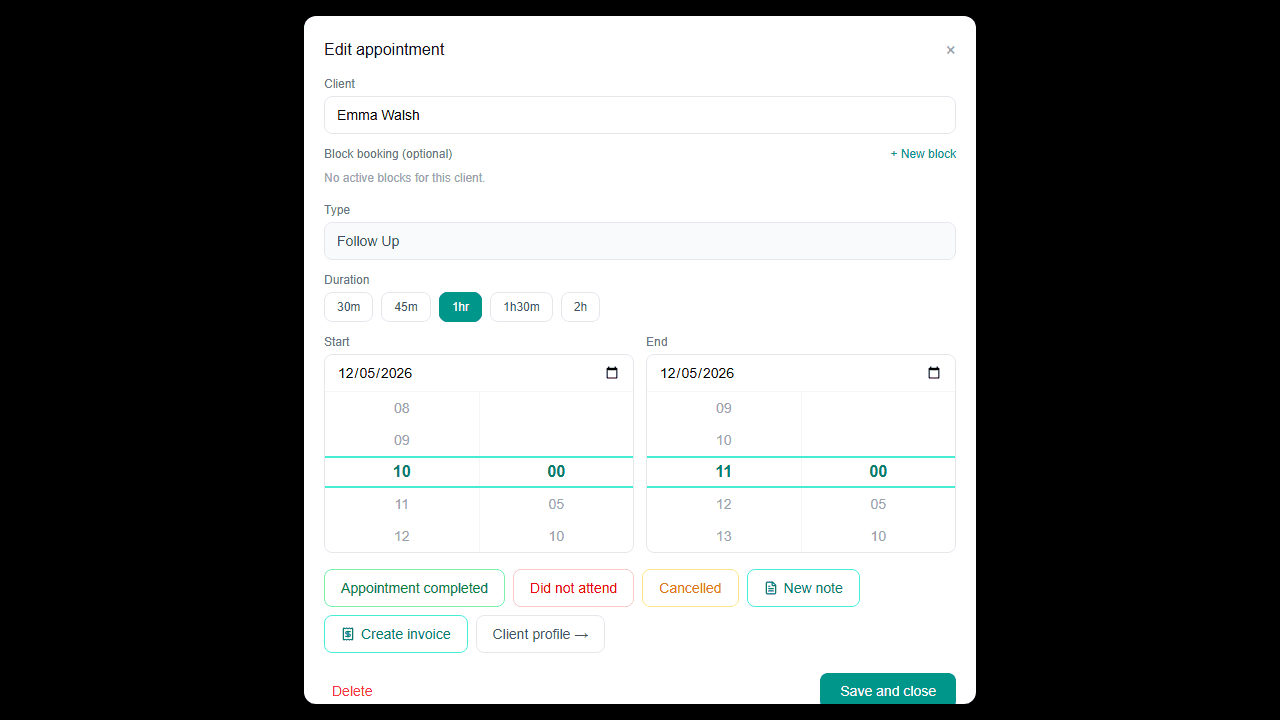
Open an appointment in the diary and scroll to the outcome section. If the appointment has been marked as attended, you'll see a Create invoice button.
Clicking it opens the new invoice form pre-filled with the patient, the appointment link, and — if a matching service item exists — the line item already added. Review the details, adjust the price or quantity if needed, and save.
The same button appears for block bookings: open the block booking in the diary and click Create invoice to pre-fill from the block.
- 5
Record a payment
There are two ways to record a payment:
From the Invoices list — find the invoice row and click Mark paid. Enter the amount, payment date, and payment method, then confirm. Use this for quick full payments.
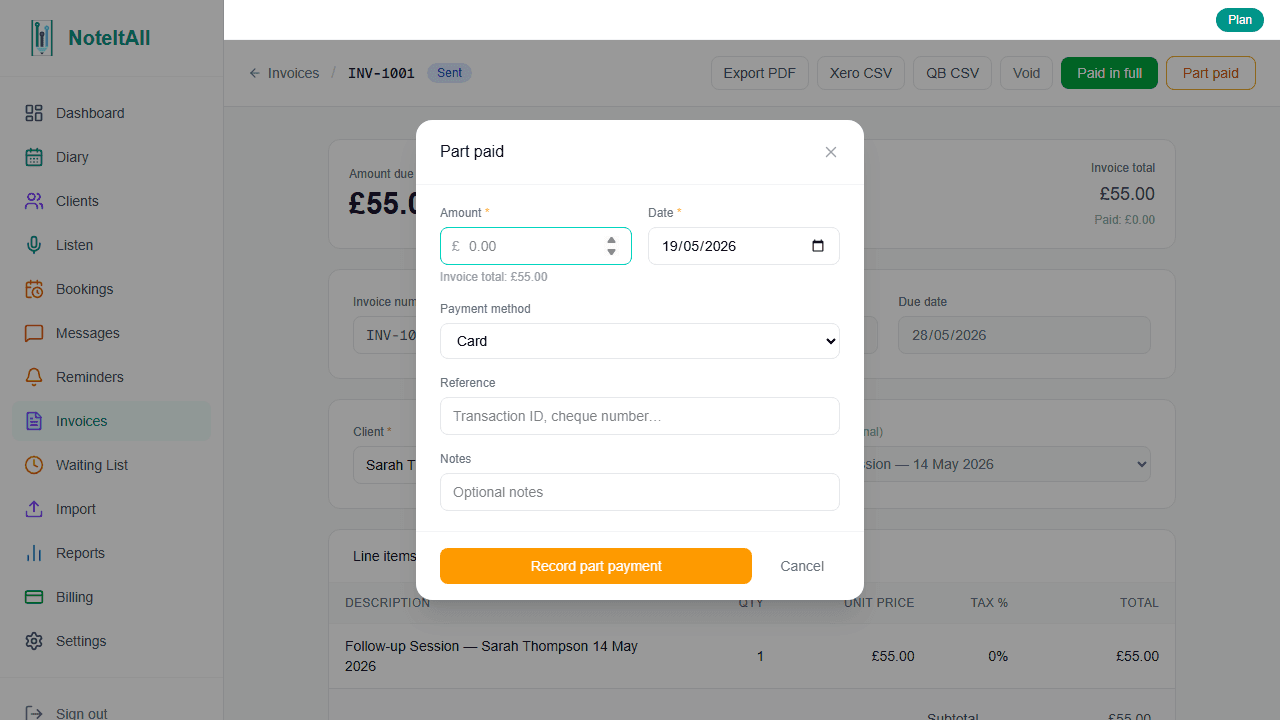
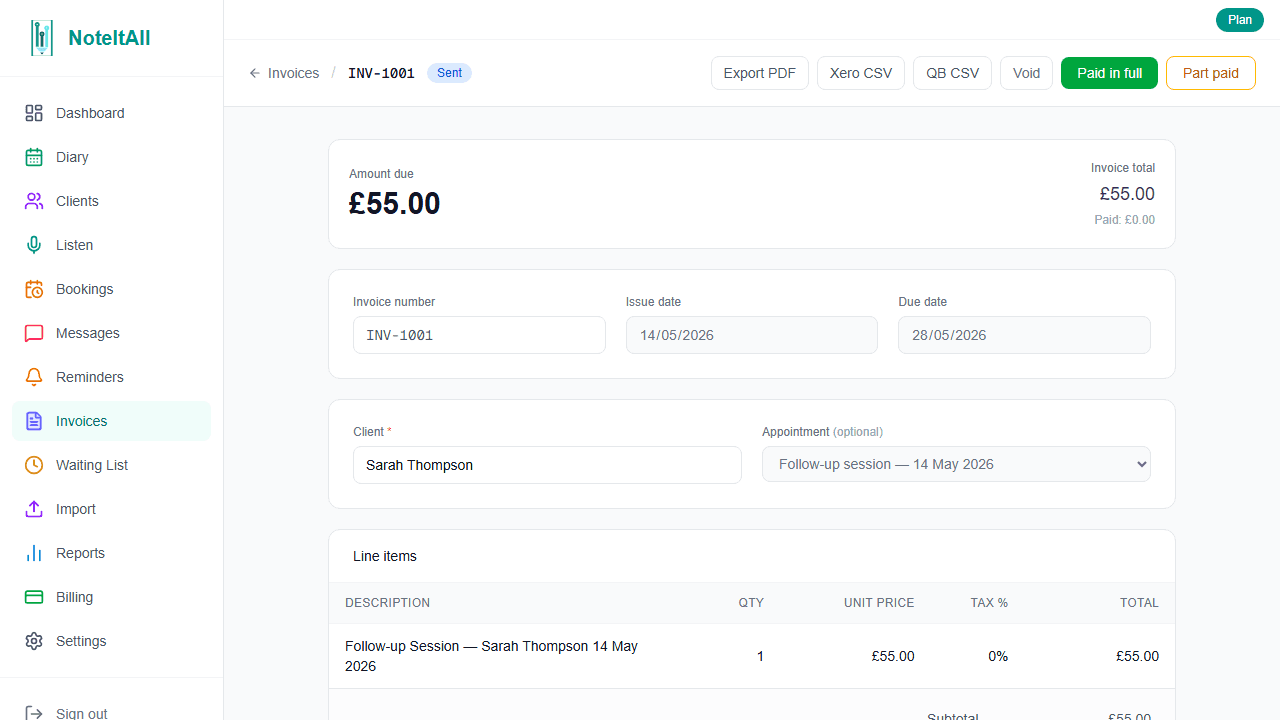
From the invoice detail page — open the invoice and use Paid in full to record the full remaining balance, or Part paid to record any amount. Part paid accepts an amount, date, method, an optional reference (e.g. a bank transaction ID), and optional notes.
The invoice status updates automatically: a partial payment moves the invoice to partial; a payment that covers the full balance moves it to paid. You never need to change the status manually.
All recorded payments appear in a payment history table at the bottom of the detail page. Each entry has a delete button if you need to correct a mistake.
- 6
Export and send the invoice as a PDF
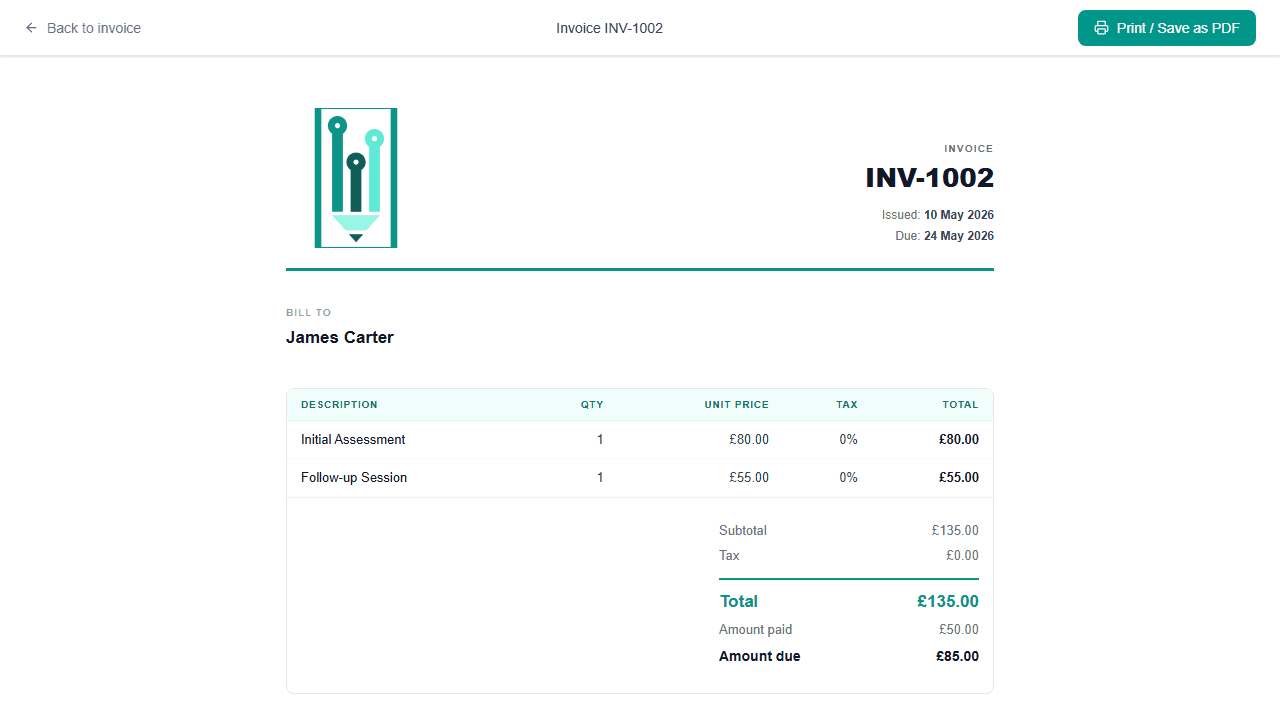
Open the invoice and click Preview. The invoice opens as a print-ready page showing your clinic logo, client details, line items, totals, bank details, and any notes.
Use your browser's Print dialog (or press Ctrl + P / Cmd + P) and choose Save as PDF as the destination. Save the file, then attach it to an email in your normal email client and send it to the patient.
The PDF reflects the display toggles in Settings → Invoices — client address, date of birth, NHS number, and appointment type are each shown or hidden based on those settings.
- 7
Voiding or deleting an invoice
Drafts — delete: On a draft invoice, click Delete. If the draft is your most recent invoice (no newer invoices exist after it), it is permanently deleted and the invoice number is rolled back so the next invoice reuses that number. If other invoices exist after it in the sequence, the draft is voided instead of deleted — this preserves the numbering sequence.
Sent, partial, or overdue — void: Non-draft invoices cannot be deleted. Open the invoice and click Void. A voided invoice is kept in your records with a VOID watermark on the PDF but can no longer be edited or paid. Use void when an invoice was raised in error or an appointment was cancelled after the invoice was sent.
Good to know
- No automated email — there is no "email invoice" button. Download the PDF from the Preview page and send it from your own email client.
- Overdue is automatic — once the due date passes, the invoice displays as overdue without any action from you. The underlying status stays as sent or partial in your records.
- Block booking invoices are for record-keeping only — creating an invoice linked to a block booking does not deduct a session from the block's session count.
- All invoices are shared — anyone on your team with invoicing permission can see and edit all invoices. There is no view-only access.
What's next
With invoicing in place, you may want to configure your public booking widget so patients can book appointments online, or set up working hours for each practitioner so availability is accurate. Both are covered in their own guides.